Hello lovelies, so this is the second part of Valentines 2012! A warning before going any further - this post is going to be picture heavy as I documented making a banoffee pie (using a BBC good food recipe) in case anyone hasn't got a recipe! I got a good tip from Jetley Mess blogger though who said about caramel in a can instead of boiling condensed milk for three hours - definitely a time saver! Anyway, the first of the pictures will be my romantic dinner in, homemade by my Davie and my Valentines outfit! Then the banoffee pie made by yours truly!
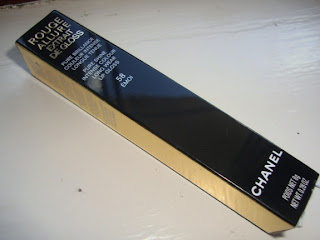
So, after being locked out of the kitchen for an hour or so in which I changed, and watched my daily dose of ER, I was surprised with a romantically laid table (candles, flowers!) and homemade Katsu Curry! I felt truly spoilt, and it was incredibly good considering it wasn't wagamamas! I was one impressed girl. On top of everything, he also bought me a small 'me to you' cake as a treat as I am always whining that I never get to have cake. So since he made all this effort for me, I thought I would dress up a little in a 50s/60s theme outfit and topped it all off with the gorgeous lipstick which is Chanel's Rouge Coco 'Gabrielle'! Plus what better occasion to wear a fancy new dress??
Dress: Dorothy Perkins; Cardigan: Dorothy Perkins; Tights: M&S; Belt: Jane Norman; Shoes: Dorothy Perkins
This dress is actually part of the new Dorothy Perkin's collection and from the moment I saw it advertised I just had to get it. I haven't had an occasion to wear it yet as its not a day dress, so it has just been hanging in my wardrobe, getting longing glances for a chance to be worn! It actually comes with a black and gold thin belt but decided to go for a waist belt again as find it more comfortable. Then some red shoes to match the lipstick and add a bit of colour to the outfit, throw on a cardigan with bows, and it made had a vintage feel to it.
Onto the second part, the homemade banoffee pie for dessert (credit to BBC food recipe):
1) You start with pre-heating the oven to 180. Then the fun part - crushing a pack of hobnobs (300g) for the biscuit base! Now, you can do this with a food processor, or, if you are old fashioned like me, throw them in a bag and bang them to pieces with a rolling pin! Incredibly therapeutic I must say, and effective!
2) Measure out 60g of butter, and add it to the biscuit mix into a bowl. I microwaved my butter for about 15 secs to get it soft and easier to mix, but if you are using a processor then its not really necessary! Then mix it together, preferably with a wooden spoon, until it starts sticking together.
3) Grease a tin, one with a removable base would be perfect as you can lift it out, and put the biscuit mix into the tin. Pour it as equally as possible, and then push down with a spoon to make it more solid and join together.
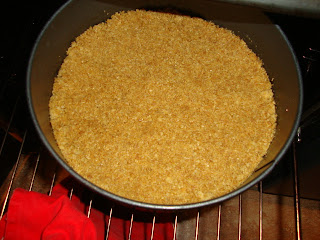
4) Into the oven it goes! For about 10mins, just to get it solid and a little more crumbly! Then, take it out to cool for a little while - getting ready for the really yummy bit!
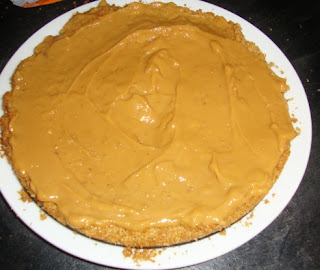
5) Its caramel time using a can of 'Carnation Caramel'! Once the base has cooled, gently lift it out of the tin and put the bottom of the tin/biscuit base onto a plate. Now crack open that tin and start spreading! Remember to do it gently though! The biscuit base easily gets stuck to the caramel and instead of spreading the caramel, you are breaking apart the base - so gently spready the caramel, making sure its an equal layer. The best bit about being the chef is licking the spoons after cooking!
6) Leave in the fridge to cool for an hour - perfect time to paint the nails, tidy up, or watch tv which is always my option.
7) Back to the fun parts! I used four bananas, but the recipe says different - I became a maverick here just throwing in all sorts of measurements! Slice the bananas, the thinner the better, and layer across covering up all the caramel.
7) Nope, it's not 'whip your hair back and forth' time, but it is whip your cream back and forth! This was the only moment that I used a bit of technology and used an electric hand held mixer to whip the cream - it was just quicker! Bad 1950s housewife eh? Use 350ml of double cream, and whip until quite stiff, but not as stiff as mine which became hard to spread.
8) Its the final stretch! If you want to be fancy, get some dark chocolate and either grate it over the cream (like I did) or melt it then drizzle it over the cream. It just adds that last little flourish before presentation!
9) Now, eat and be merry! My boyfriend (who's favourite dessert is this) can be seen doing this final step!
Anyway, that's all from me - going to watch some soppy films now with my man. Hope everyone is having a lovely day, whether you are with someone or single!
Love,


